
10×10 canopy tent assembly instructions
Assembling a 10×10 canopy tent provides a reliable temporary shelter for events․ Follow the guide for a smooth setup․ Ensure all parts are included and undamaged before starting․ Temporary shelter made easy with step-by-step instructions․ Durable materials and simple assembly ensure a sturdy structure for any outdoor event․ Events and gatherings will be stress-free with this practical guide․

1․1 Overview of the Assembly Process
The assembly of a 10×10 canopy tent involves a systematic approach to ensure stability and functionality․ Begin by unpacking and organizing all components, including poles, fittings, and straps․ The process typically starts with constructing the frame, followed by attaching the canopy securely․ Key steps include connecting the legs, extending the frame, and ensuring the canopy is tightly fastened․ Additional features like side walls or weight plates can be added for enhanced durability․ The entire process is designed to be straightforward, requiring minimal tools and teamwork for efficient setup․ Proper assembly ensures a sturdy shelter for various outdoor events and activities․
1․2 Importance of Following Instructions
Following the assembly instructions for a 10×10 canopy tent is crucial for ensuring safety, stability, and proper function․ Incorrect assembly can lead to structural issues, making the tent unsafe in windy or rainy conditions․ By adhering to the guide, you minimize the risk of damage to the tent or injury to people nearby․ Proper steps ensure the canopy is securely attached, and all fittings are tightened correctly․ Neglecting instructions may result in a poorly constructed shelter that fails to provide adequate protection․ Always double-check each step and verify that all parts are correctly aligned and secured before finalizing the setup․ This ensures longevity and reliability for your outdoor events․
Preparing for Assembly
Choose a clean, level area free from debris and obstructions․ Ensure the ground is firm and even․ Gather all parts and tools, and have at least two people assist․ Unpack and organize components by type or label․ Double-check the inventory to confirm all pieces are included․ Clear the area to avoid tripping hazards․ Weather conditions should be calm to prevent wind interference during assembly․ Proper preparation ensures a smooth and efficient setup process․
2․1 Choosing the Right Location
Selecting the ideal spot for your 10×10 canopy tent is crucial․ Ensure the area is flat and level to prevent unevenness․ Avoid low-lying spots where water may collect․ Choose a location with firm ground, such as grass or compacted dirt, to secure the tent effectively․ Keep it away from power lines, trees, and other obstructions to ensure safety․ Also, consider wind direction and sunlight exposure for comfort․ Clear the area of debris, rocks, and sharp objects to prevent damage to the tent fabric․ Proper site selection enhances stability and ensures a safe, enjoyable setup for any event․
2․2 Unpacking and Inventory of Parts
Before assembling your 10×10 canopy tent, carefully unpack and organize all components․ Check for damage or missing items․ Use the provided checklist to ensure all parts, such as poles, fittings, straps, and stakes, are included․ Separate and label components like roof tops, side poles, and leg assemblies for easy access․ Inspect each part for visible damage or wear․ If any items are missing or damaged, contact the manufacturer immediately․ Organize smaller hardware, like screws and pins, in a designated container to avoid loss․ This step ensures a smooth and efficient assembly process, preventing delays or complications later․

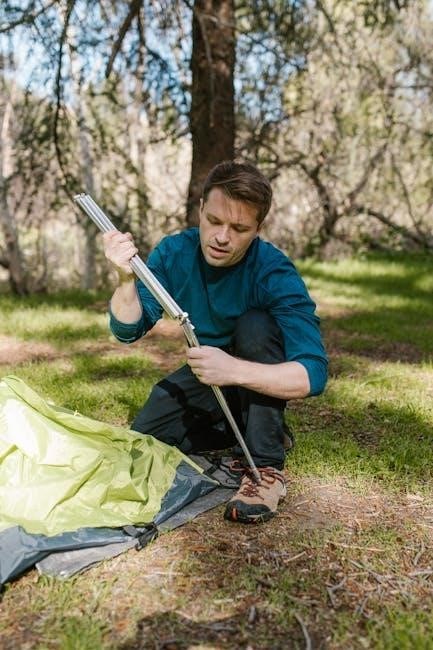
Step-by-Step Assembly Instructions
Begin by attaching the canopy to the frame using the provided straps and fittings․ Connect the leg assemblies and extend the poles to form the base structure․ Follow the sequence outlined in the instructions to ensure stability․ Tighten all connections firmly to secure the tent․ Use the color-coded parts to guide proper alignment․ Ensure the canopy is evenly spread and tightly fastened to the frame for a sturdy setup․ Double-check all connections before finalizing․ Proper assembly ensures safety and durability, so take your time and follow each step carefully․ Always refer back to the manual if unsure․
3․1 Attaching the Canopy to the Frame
Start by aligning the canopy with the frame, ensuring the Velcro straps match the corresponding points on the frame․ Secure the canopy by attaching the straps tightly around the frame’s legs․ Next, insert the Y straps through the metal rings on the tent’s valances, making sure they are on the outside of the legs․ Tighten the straps evenly to avoid uneven stress on the canopy․ Use the provided wrench or tool to secure the straps firmly․ Finally, double-check that the canopy is evenly spread and tightly fastened to the frame for a stable and secure setup․ Proper attachment ensures the tent’s structural integrity and durability․
3․2 Constructing the Frame and Leg Assembly
Begin by placing the frame in the center of your chosen location; Extend the legs outward while ensuring the frame remains balanced․ Insert the hip rafter pipes into the corner fittings and secure them with the provided 16p nails․ Connect the top long pipe to the big top connector, ensuring a snug fit․ Repeat this process for all four corners to form the frame’s structure․ Once the frame is assembled, attach the legs to the corners using the 4-way crown fittings․ Tighten all connections firmly but avoid overtightening, as this may damage the fittings․ Ensure all parts are securely locked in place for stability․
Securing the Tent
Securing the tent ensures stability and safety․ Tighten all straps firmly and anchor the tent with stakes or weights․ Regular checks ensure a stable structure․
4․1 Tightening the Canopy Straps
Tightening the canopy straps is crucial for a secure setup․ Ensure all straps are snug and evenly adjusted․ This prevents sagging and enhances stability․ Use the provided buckles to tighten each strap, starting from the center and moving outward․ Make sure the canopy top is evenly spread and the fabric is taut․ Over-tightening can damage the straps, so check each one for proper tension․ Regularly inspect the straps for wear and tear, and replace any damaged ones immediately․ Properly tightened straps ensure the tent remains stable even in windy conditions, providing a safe and reliable shelter for your events․
4․2 Anchoring the Tent to the Ground
Anchoring the tent to the ground is essential for stability and safety․ Use the provided stakes to secure each leg of the tent frame․ Drive the stakes into the ground at an angle, ensuring they are firmly embedded․ Tighten the ropes attached to the canopy and wrap them around the stakes․ Make sure all ropes are evenly tensioned to prevent the tent from shifting․ For added stability, consider using sandbags or weight plates on the legs․ Regularly check the anchors, especially in windy conditions, to ensure the tent remains secure․ Proper anchoring ensures the tent withstands outdoor conditions, providing a safe and reliable shelter for your events․
Additional Features and Accessories
Enhance your 10×10 canopy tent with optional side walls, weight plates, and sandbags for added stability․ Customize with accessories like lights or ventilation kits for improved functionality and comfort․
5․1 Installing Side Walls
Installing side walls on your 10×10 canopy tent enhances functionality by offering additional shade and protection from wind․ Begin by identifying the side wall panels, which typically feature Velcro attachments or hooks designed to securely fasten to the canopy’s top edge․ Align each wall with the corresponding side of the tent frame, ensuring proper positioning for a snug fit․ Use the provided straps or ropes to tightly secure the walls to the frame, preventing any flapping in the wind․ For maximum stability, attach all four walls, but you can also choose to install only those needed based on weather conditions․ After installation, inspect each wall to ensure they are tightly fastened and evenly aligned․ This step not only improves the tent’s structural integrity but also provides a more enclosed and comfortable space for your event․ Remember to refer to the manufacturer’s instructions for specific attachment methods to ensure a safe and secure setup․
5․2 Adding Weight Plates or Sandbags
To ensure stability and safety, especially in windy conditions, weight plates or sandbags are essential for securing your 10×10 canopy tent․ Place one weight plate or sandbag on each leg of the tent, ensuring even distribution of weight․ This prevents the tent from shifting or toppling over․ For added stability, you can also attach weights to the frame’s base using straps or ropes․ Always follow the manufacturer’s recommendations for the appropriate weight and placement․ Avoid overloading, as this could damage the frame․ Properly securing the tent with weight plates or sandbags ensures a safe and enjoyable outdoor experience, protecting both the tent and its occupants from wind damage․

Safety Precautions and Maintenance

Always follow safety guidelines during assembly and use․ Ensure the tent is dry before storing to prevent mildew․ Regularly inspect and clean the fabric to maintain durability and appearance․
6․1 Safety Tips During Assembly
Always assemble the tent with two people to ensure stability․ Avoid setting up in strong winds or bad weather․ Wear protective gloves and eyewear to prevent injuries․ Keep children away from the assembly area․ Ensure the ground is level and clear of debris․ Follow all manufacturer instructions carefully․ Never modify the tent structure or use unauthorized parts․ Regularly inspect all components for damage before use․ Secure the tent firmly to the ground using anchors and straps․ Store the tent dry and clean to prevent mildew․ Follow all safety precautions to ensure a safe and durable setup for your outdoor events․
6․2 Cleaning and Storing the Tent
Regular cleaning and proper storage are essential for maintaining your 10×10 canopy tent․ Always clean the tent fabric with a mild detergent and water, avoiding harsh chemicals or abrasive materials․ Allow the tent to air dry completely before storing to prevent mildew․ Store the tent in a cool, dry place, away from direct sunlight and moisture․ Use the original storage bag or a breathable container to protect the tent․ Ensure all parts, including frame and straps, are clean and dry before storage․ Proper maintenance will extend the lifespan of your tent and ensure it remains in great condition for future use․